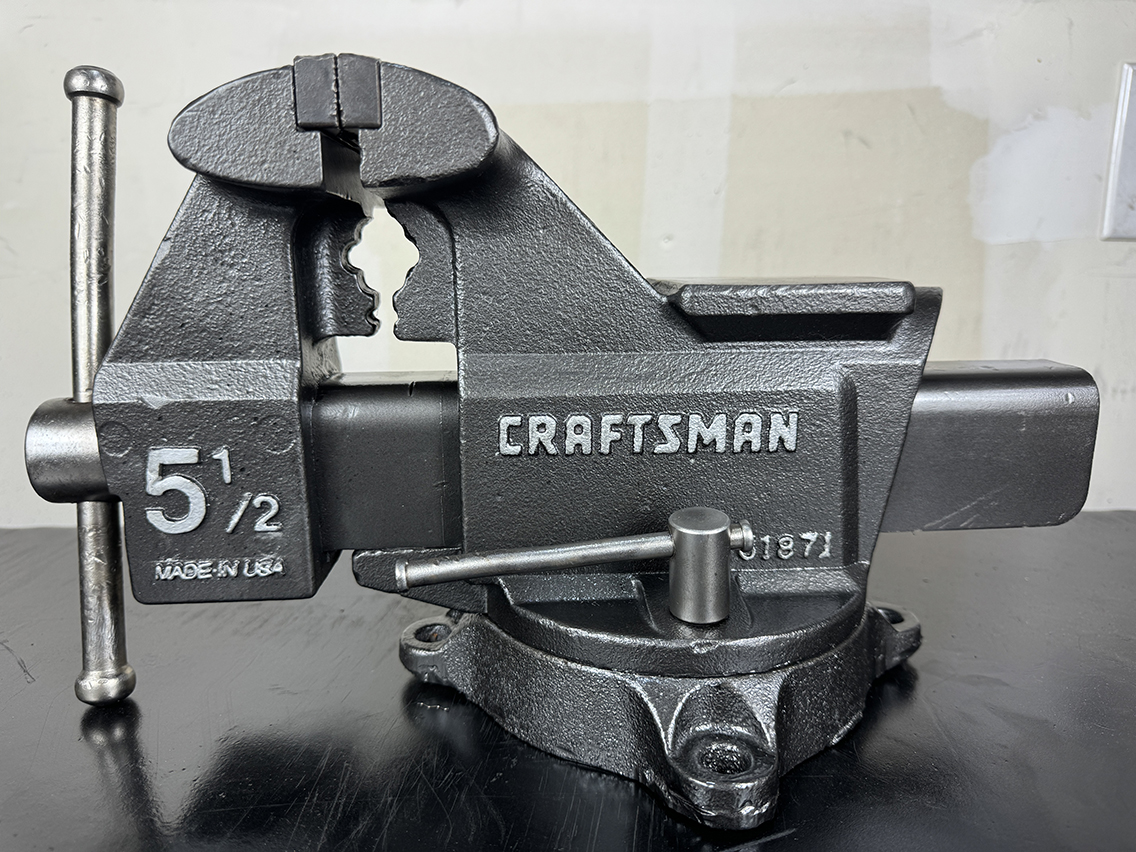
Craftsman (51871) 5 1/2″ Bench Vise / Metal WorkBench Restoration
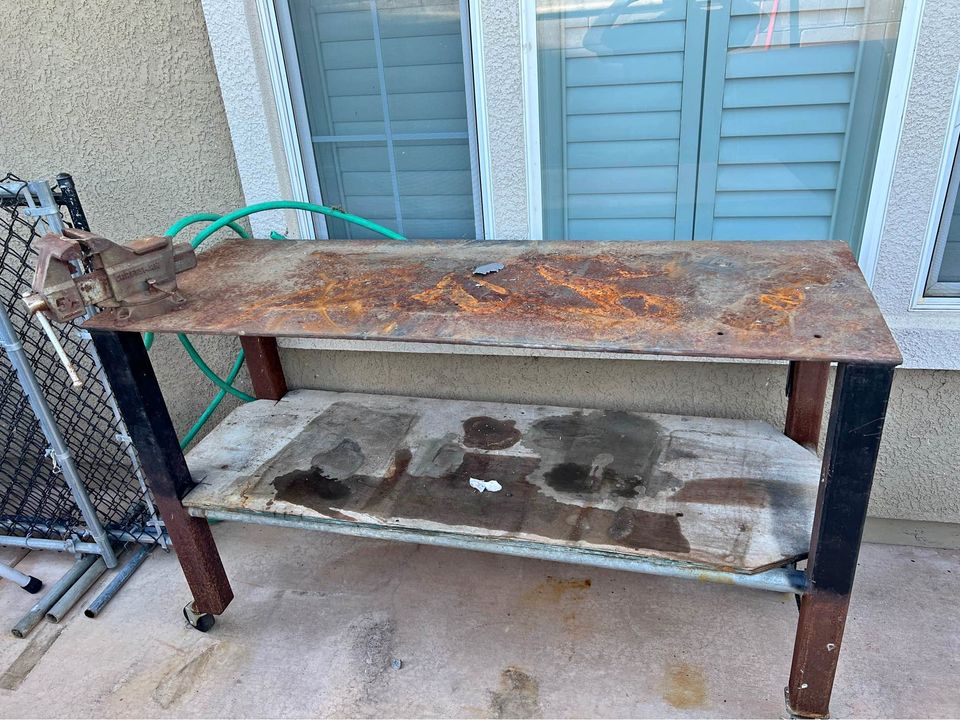
My bench grinder has been floating all over my workshop and doesn’t really have a home. It’s problematic when tools do not have a home. Things get cluttered and I find I have to constantly move tools out of the way to make room for a workspace. I have several tools without a home and have decided to correct this problem one by one. I also wanted another vise because I use it a lot for grinding and cutting and wanted to keep all the metal dust on one side of my workshop. I started by looking for a heavy, long, metal workbench that can accommodate several tools. I’m thinking the vise on the left, Evolution S380 CPS, then my bench grinder on the right. This would be a perfect setup. But where could I find such a bench? And how much would it cost to fabricate? I always start out looking on FaceBook Marketplace for ideas. I for one know the wheel was invented a long time ago and have lots to learn. After hours of searching and researching, I found the perfect bench on Marketplace. My requirements were as follows, it had to be at least 5′ long, it had to be heavy, and I prefer that it had a thick metal top.
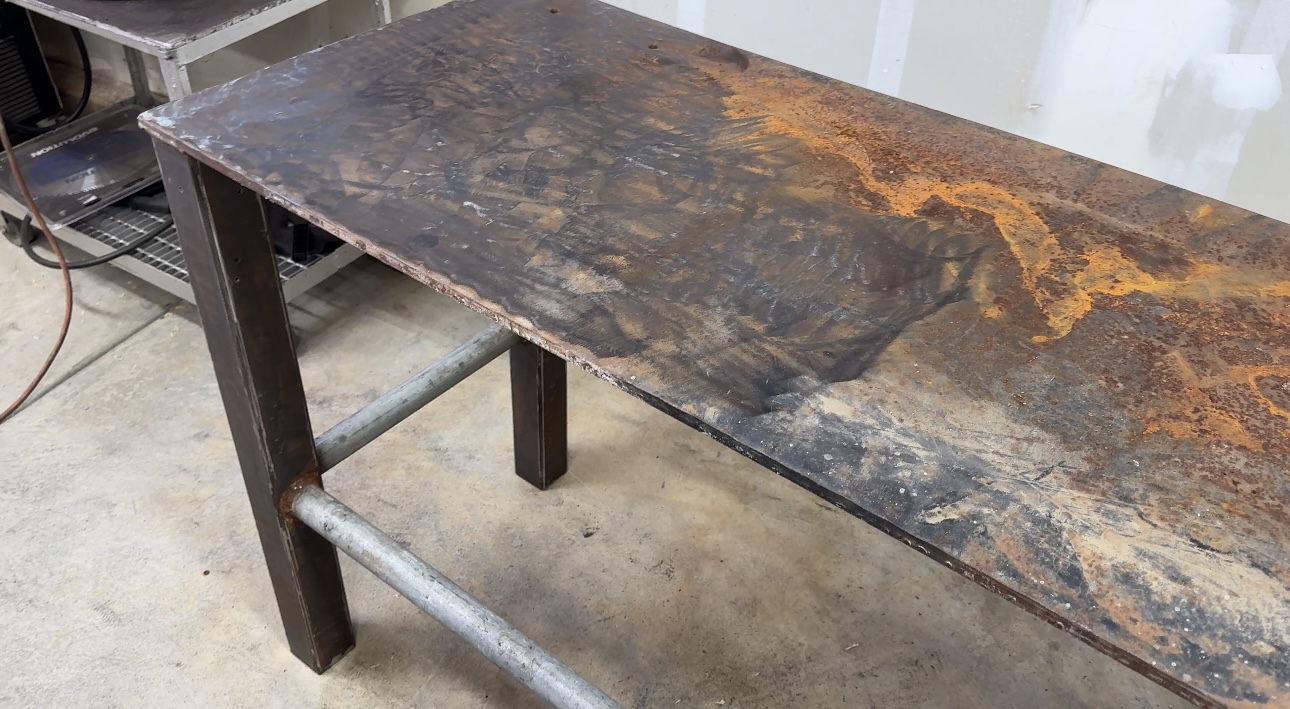
This bench met all those requirements! But, it was in pretty bad shape. The previous owner had left it in the elements and it had a generous layer of rust all over it.
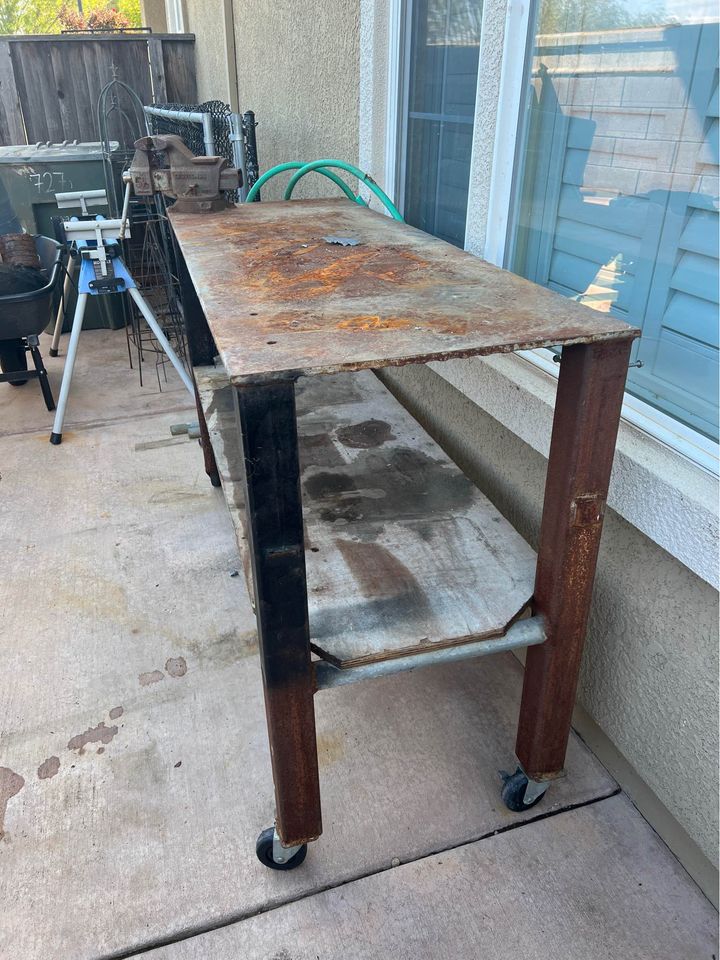
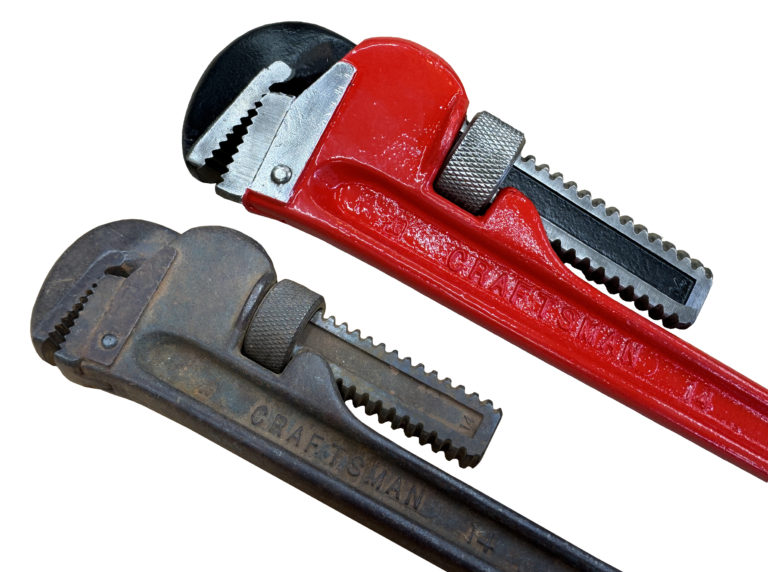
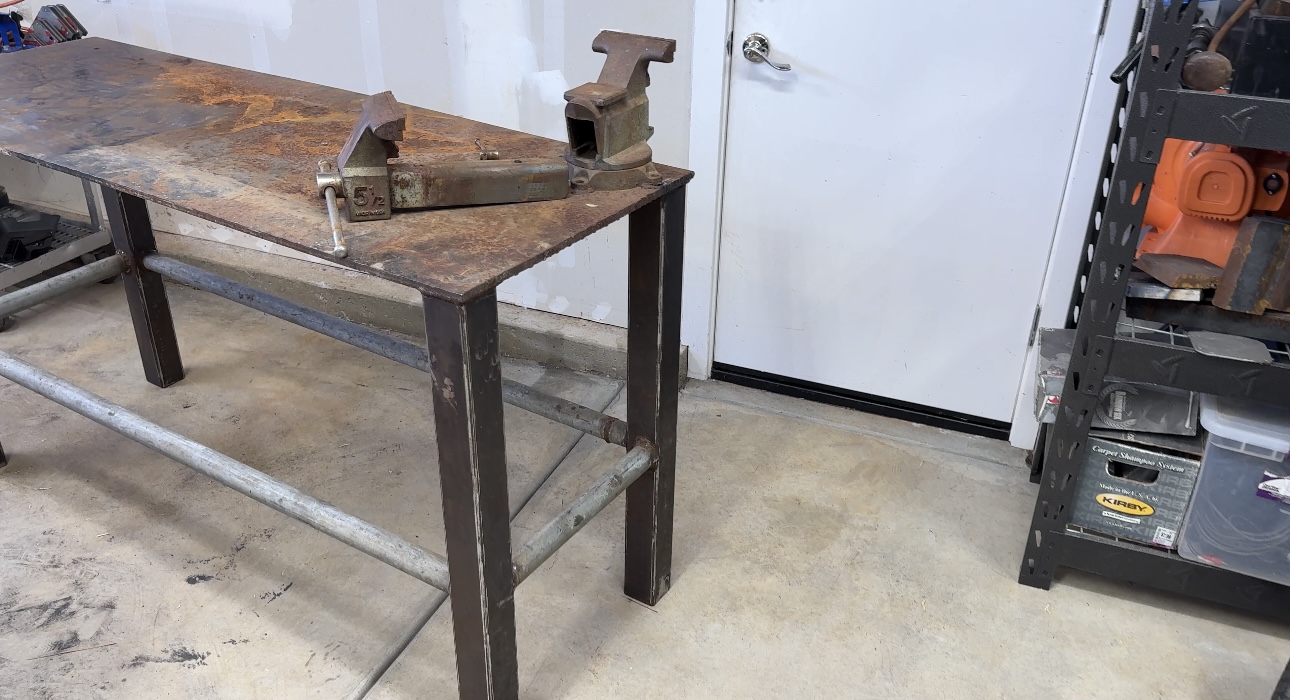
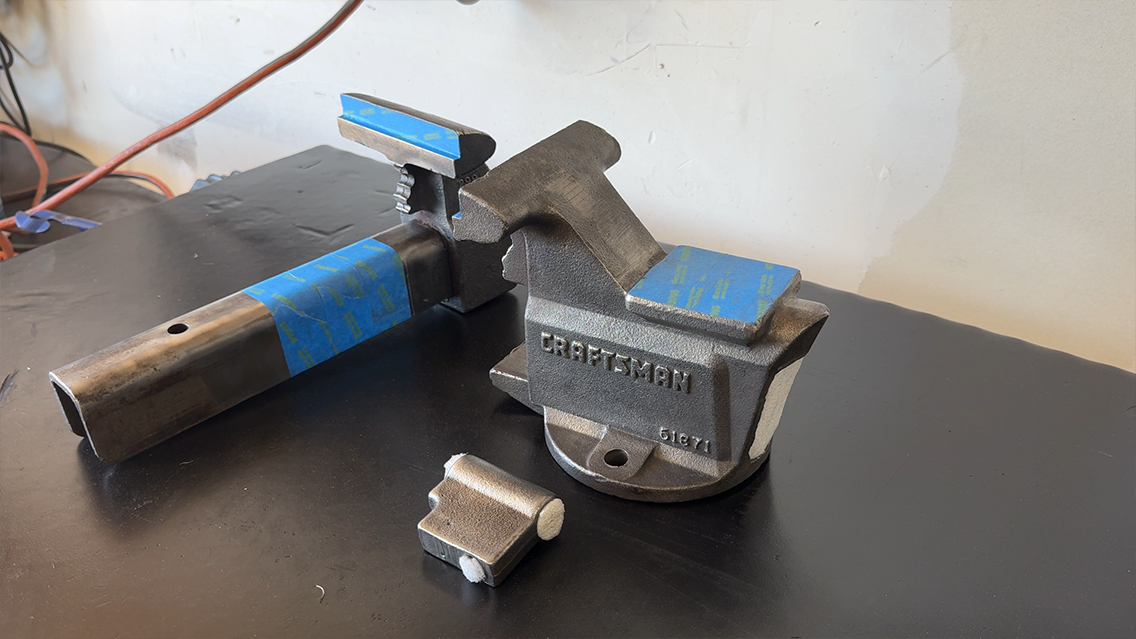
The weird thing was they decided to weld a vise to it. I had no clue what brand of vise or if it was any good. But, I was very pleased to learn I could potentially kill two birds with one stone. It was too good to be true I thought. I made them an offer and after a day of chewing all my fingernails off they responded and said I could come pick it up. Not having a truck is beginning to be very problematic. Especially when “that tool” is very expensive. I suppose after I start fabricating stuff for clients I could save up for one.
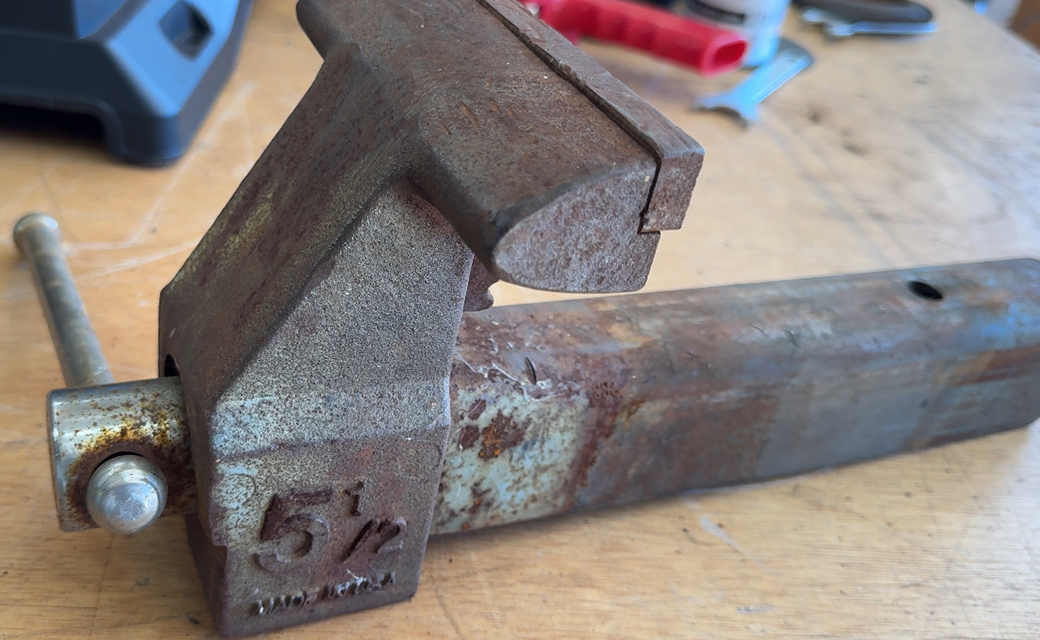
My good friend and pastor Michael agreed to help me pick this beast of a table up. After driving 1:30 hours I was wondering if it was worth the trip. Well, it was! The thing was very heavy with a 1/2″ thick steel top. The vise just happened to be a Craftsmen (51871) 5 1/2″ Bench Vise. Perfect! We loaded it in the truck and strapped it down. This thing has to weigh in at 300+ Lbs. It had very large casters on it that made the table 44″ high. Way too high for me! So Michael and I laid it on it’s side on top of my outfeed workbench and I cut the casters off with my Benchmark Abrasives 4-1/2″ X .040 X 7/8″ T1 Premium Thin Cut-off Wheel. Then I gently set it on the ground. It was the perfect height!
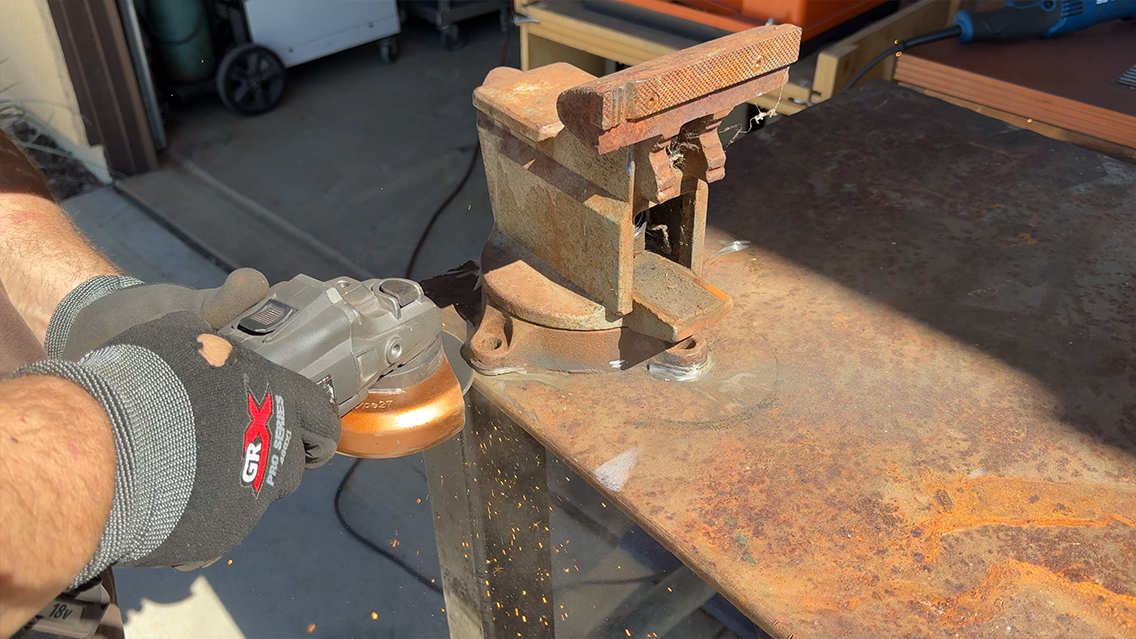
I got two moving dollies and rolled it outside to begin the restoration process. I first grinded the outside of the welds using my Benchmark Abrasive 4.5″x1/4″x7/8″ Type 27 Grinding Wheel.
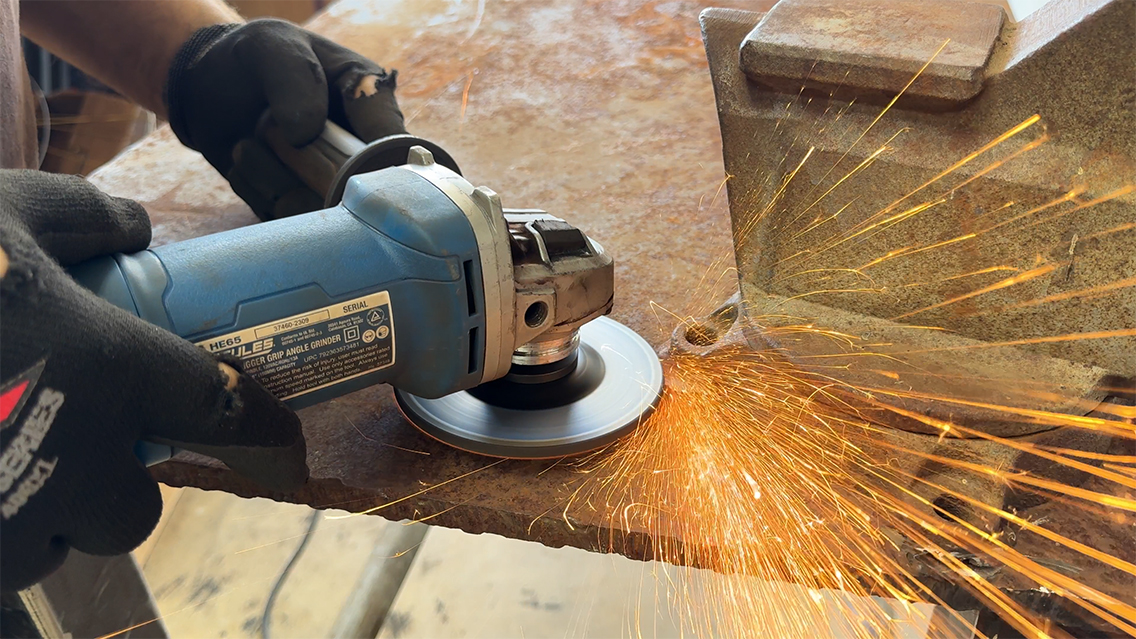
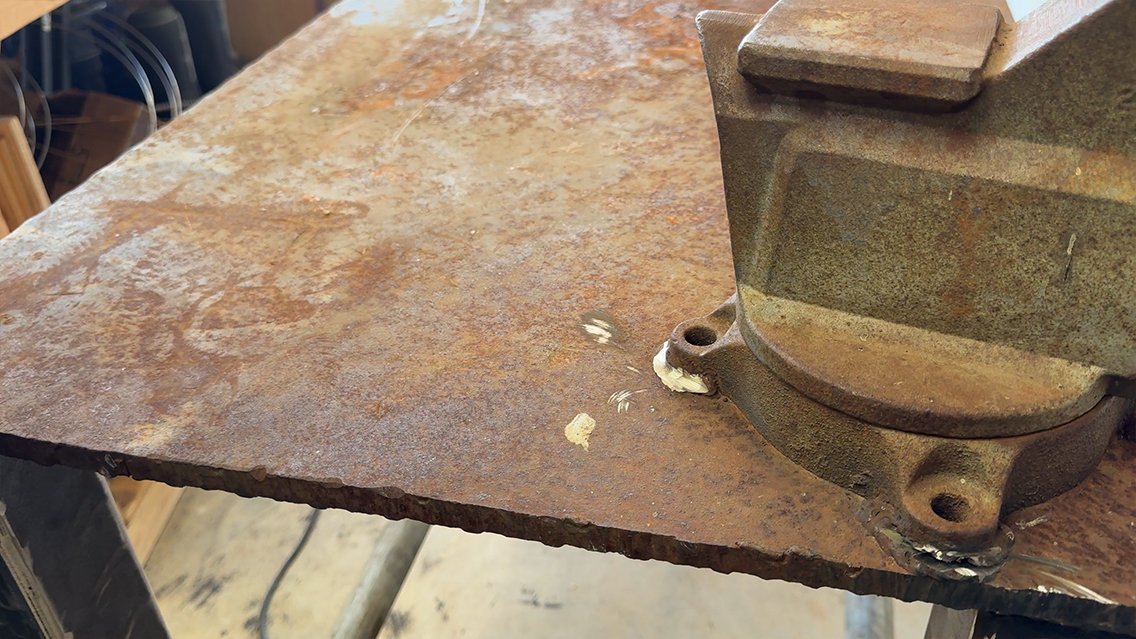
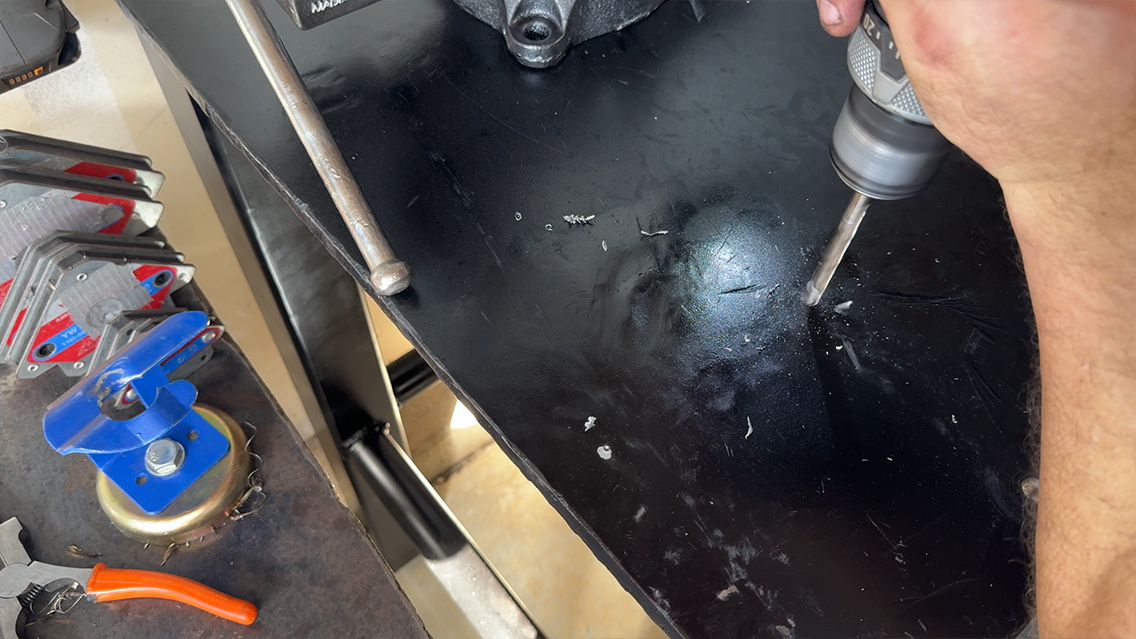
Then I used an Benchmark Abrasives 4-1/2″ X .040 X 7/8″ T1 Premium Thin Cut-off Wheel to detach the vise from the bench. It was no easy task! Unfortunately, the vise base got a little nicked in the process. After removing the vise, I repaired the gouges I made to the table trying to get the vise off.
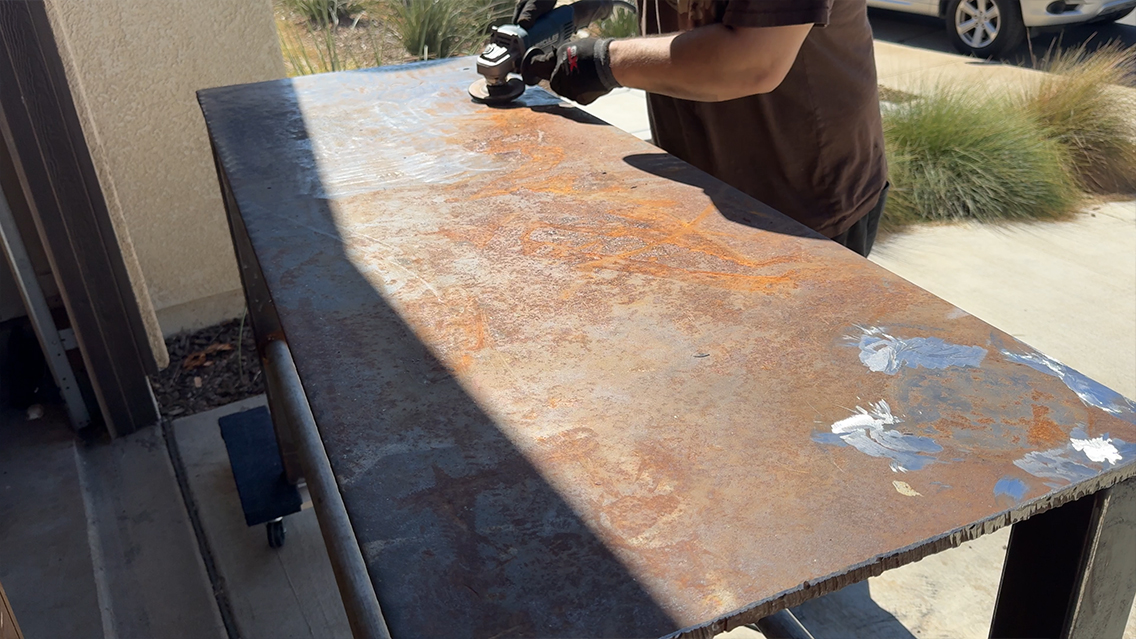
I took a Benchmark Abrasives 40 Grit T29 High Density Flap Disc and went to work clearing all the rust from the bench. It made quick work of all the rust. I only used one disc. I’m sure it has more life left in it!
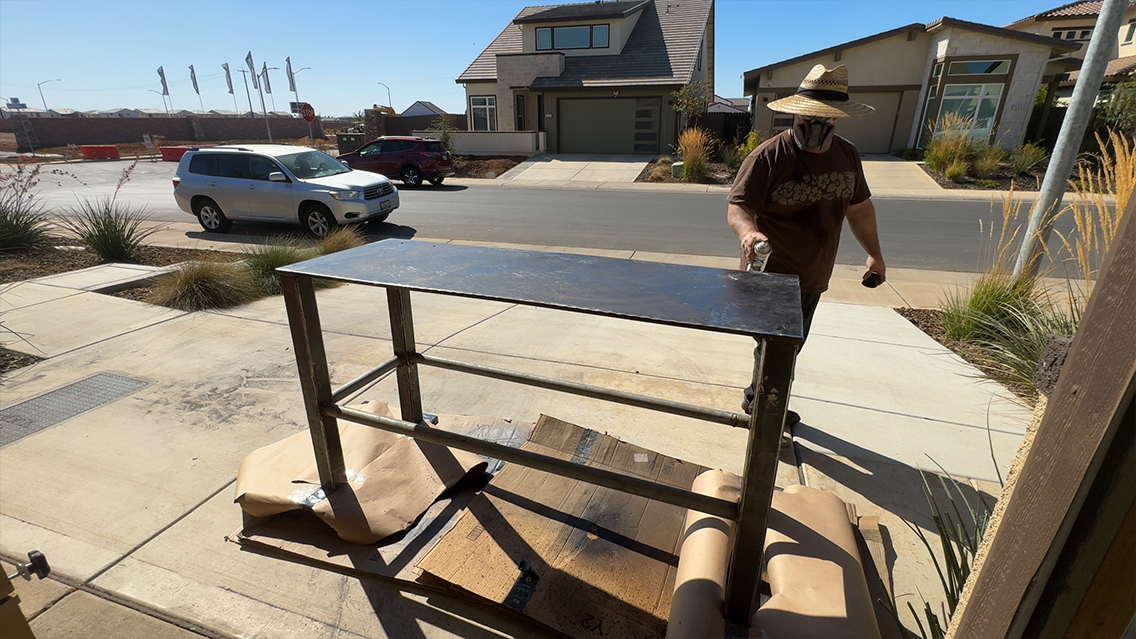
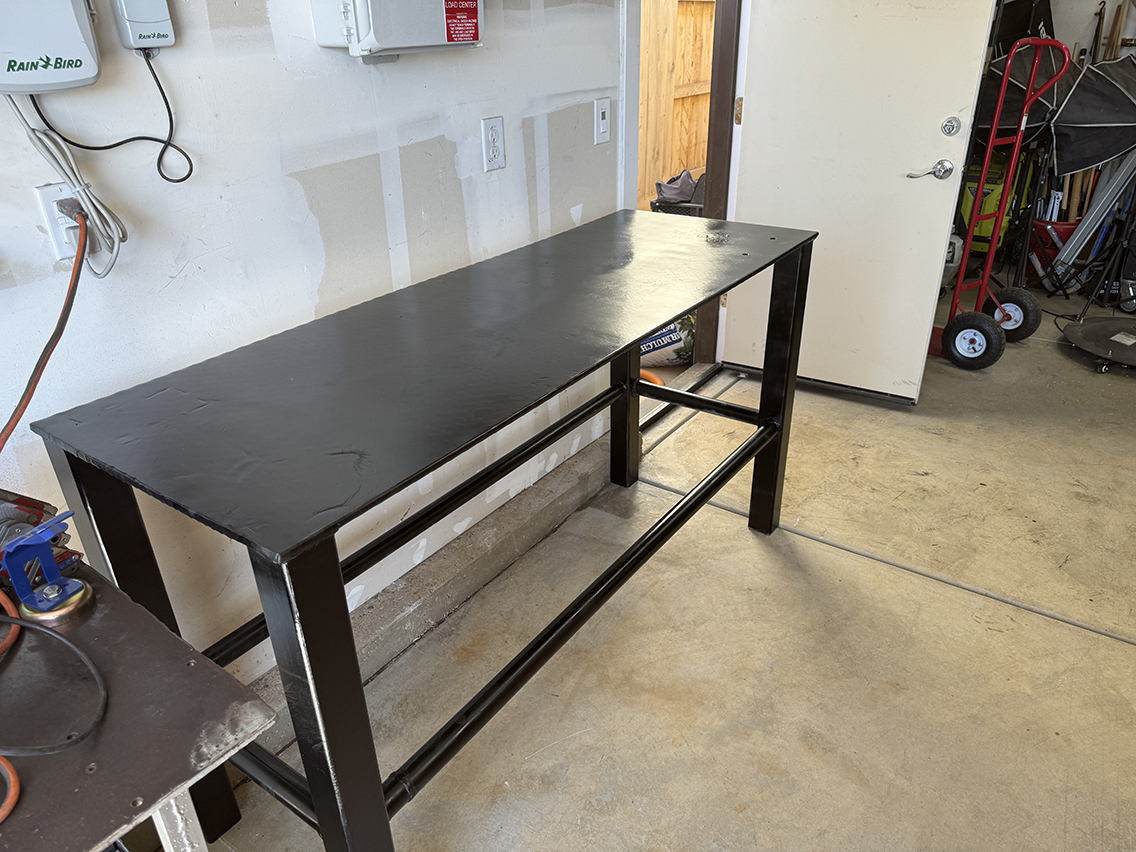
After getting the bench prepped for painting by using Acetone, I gave it a coat of Rustoleum Semi-Gloss Black spray paint. That bench had never looked so good in years! I rolled it back in and set it in it’s final resting place.
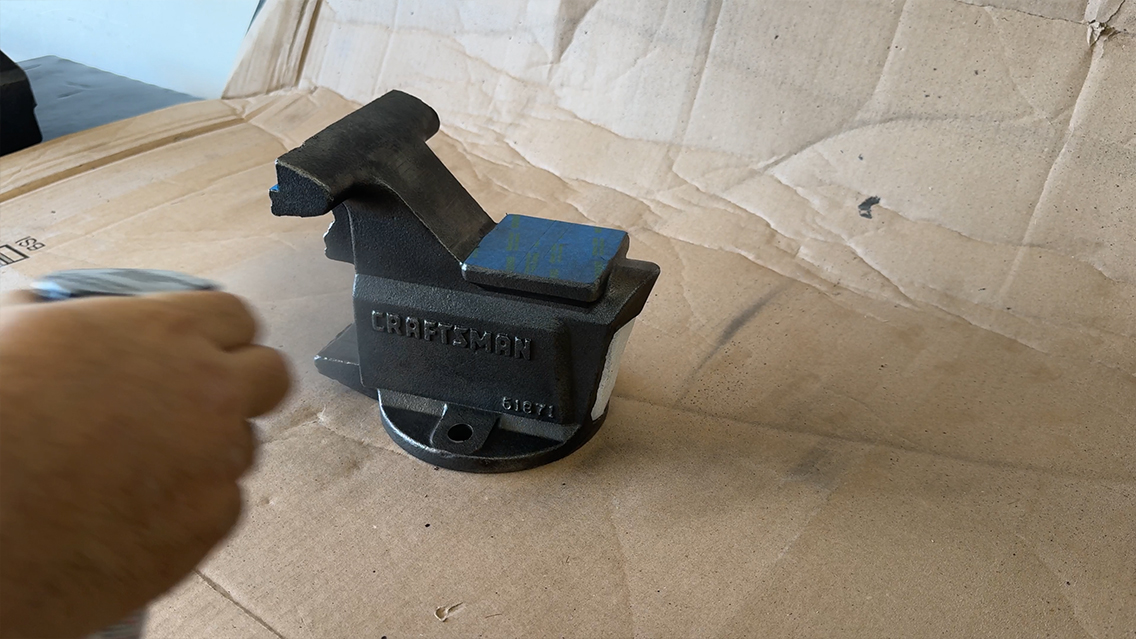
With that out of the way, I decided to focus on the vise. I love restoring old tools! After restoring the Atlas drill press, I was hooked. I was so excited to do this again. The vise was in rough shape and needed lots of love.

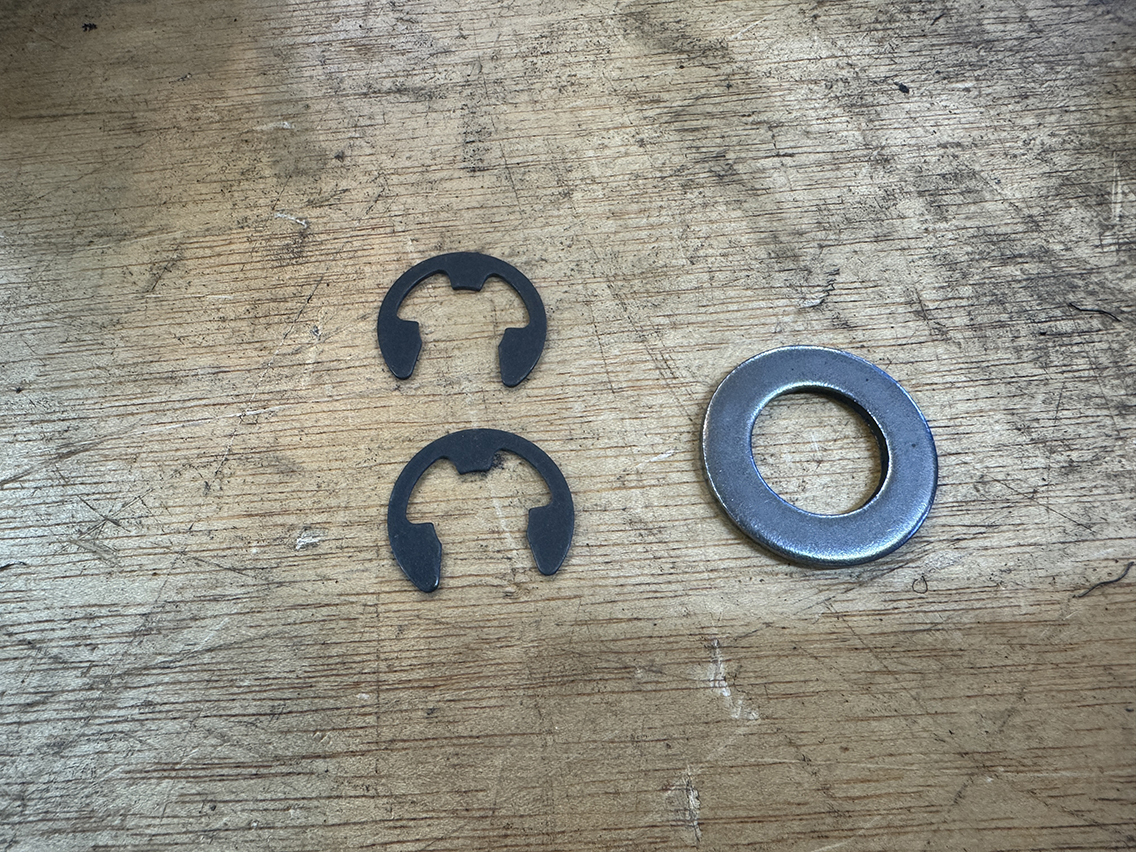
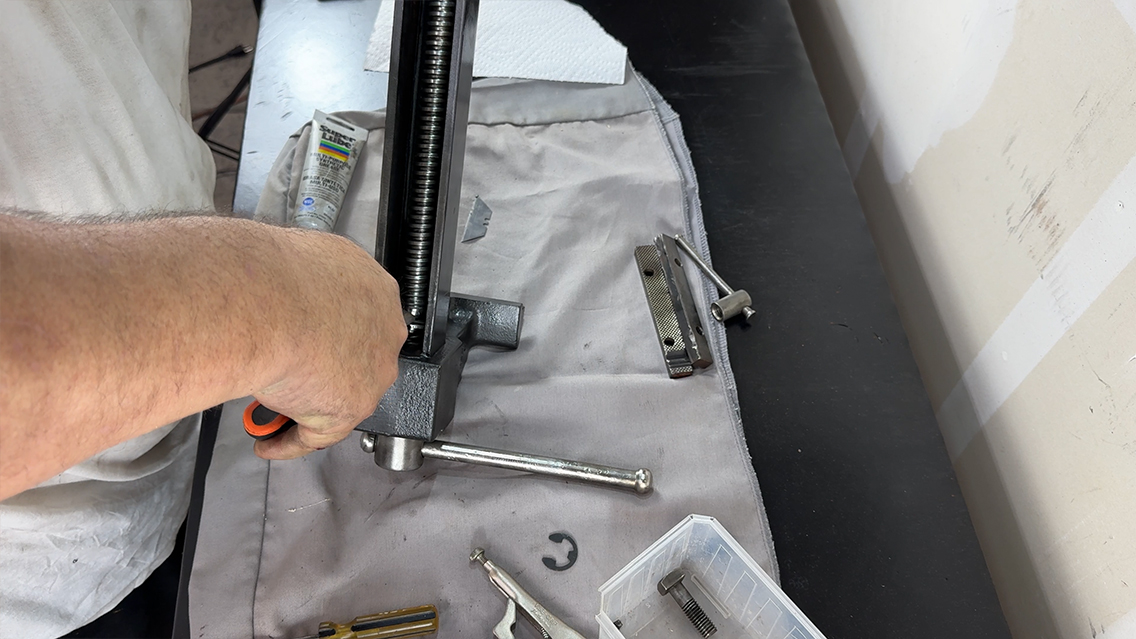
I took the vise all apart and found out the previous owner had welded the e-clip to the shaft of the vise. There wasn’t even a washer on the shaft. This was not good because I wanted to completely restore and clean it up.
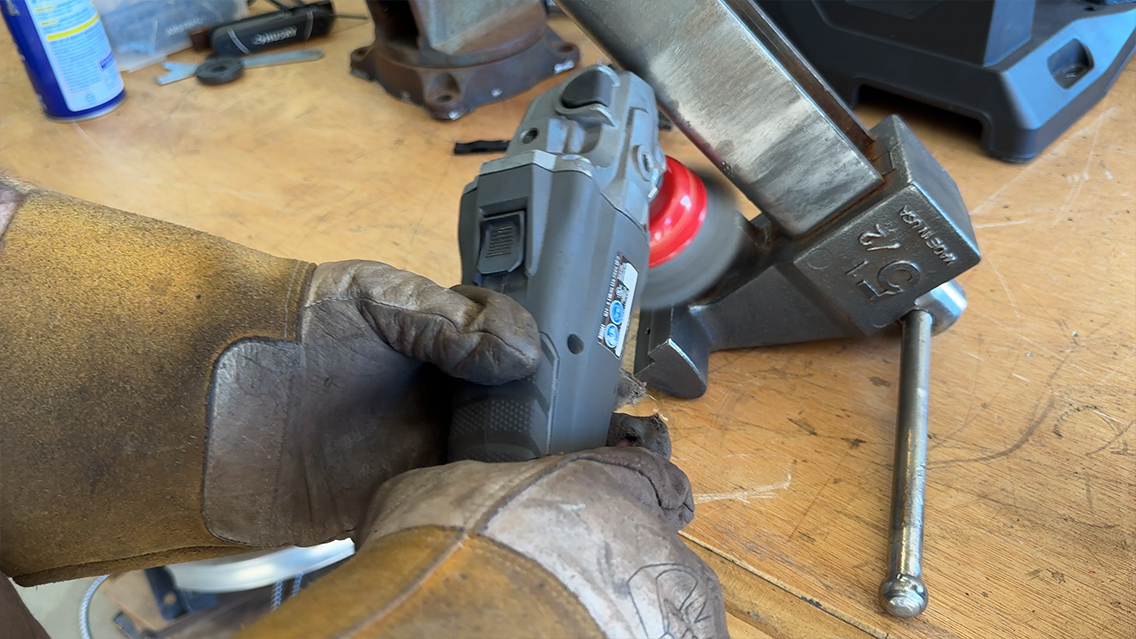
So I took my dremel with a cut off wheel and surgically removed the small welds holding the e-clip to the shaft. Now I needed to look for an e-clip and washer. The spring was still good, but later found out it wasn’t the original spring. I had to modify it to make this work. So after searching, I found what I needed at the ACE hardware store. That place is amazing and has a lot of hard to find stuff. A gentlemen by the name of Michael helped me find what I needed. Funny, now I have two Michaels that have helped me. My guardian angels you might say.
I took those pieces home, sat them aside, and started another restoration journey. Each piece was wire brushed with a Benchmark Abrasives 4″ Standard Twist Knot Wire Wheel. I meticulously got into every corner and crevasse getting all the rust out. I used a generic cup wire wheel for all the hard to get areas. Finally, all the rust was off. I got the Acetone out and wiped everything down.

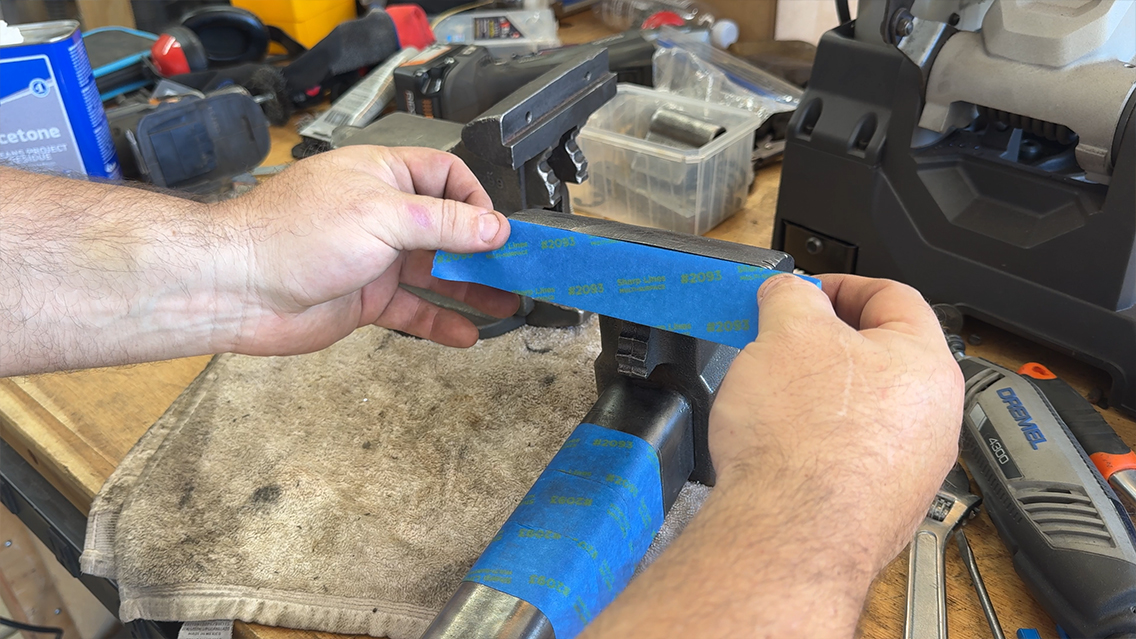
After that, I got my blue tape and taped off all the areas I didn’t want paint on. I used some specialized polyethylene foam to block the large openings like bolt holes and inside the vise body. It worked perfectly, and I will continue to keep this handy for future restorations.
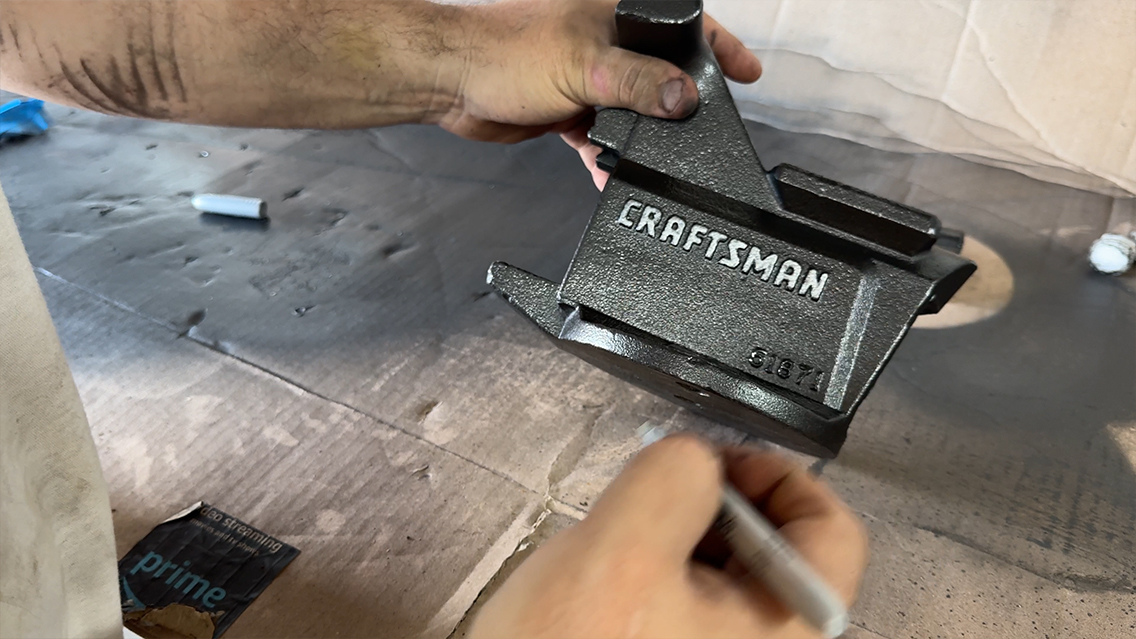
After prepping for painting, I used a can of Rustoleum Black Stainless Steel spray paint, the same paint I used for the Atlas Drill Press. After painting everything, I let it cure and marked the raised casting letters with my silver sharpie marker. So now all my restored tools will have a common color theme.
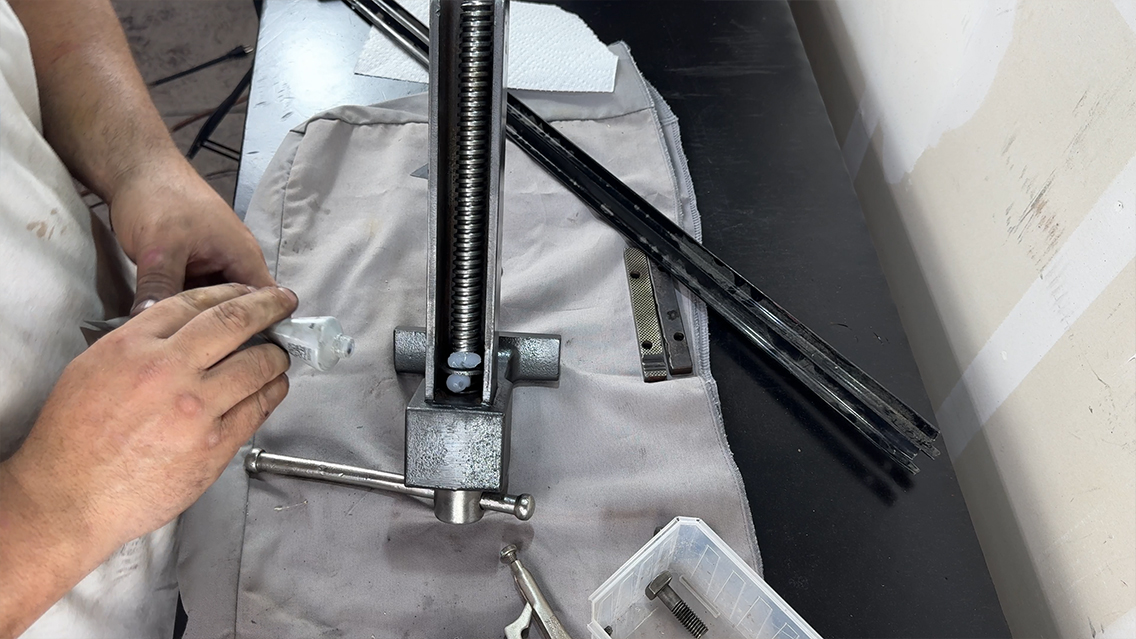
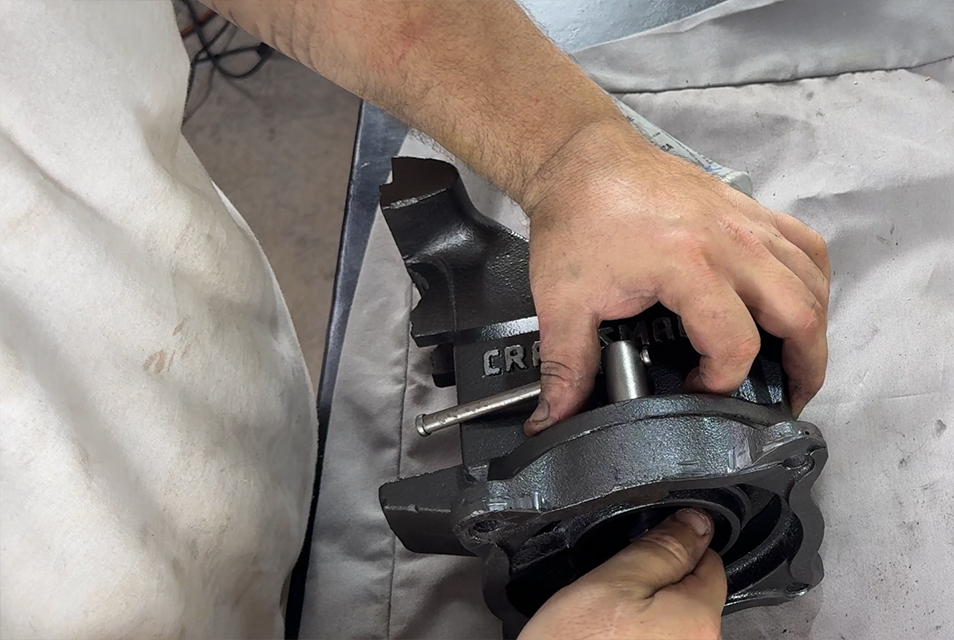
It was time to put everything together. I started with the movable jaw and handle/shaft assembly. I dropped the modified spring followed by the washer down the shaft against the movable jaw. I depressed the spring and washer with some long pieces of metal I had laying around. Then I pushed the e-clip in the shaft grove locking everything secure.
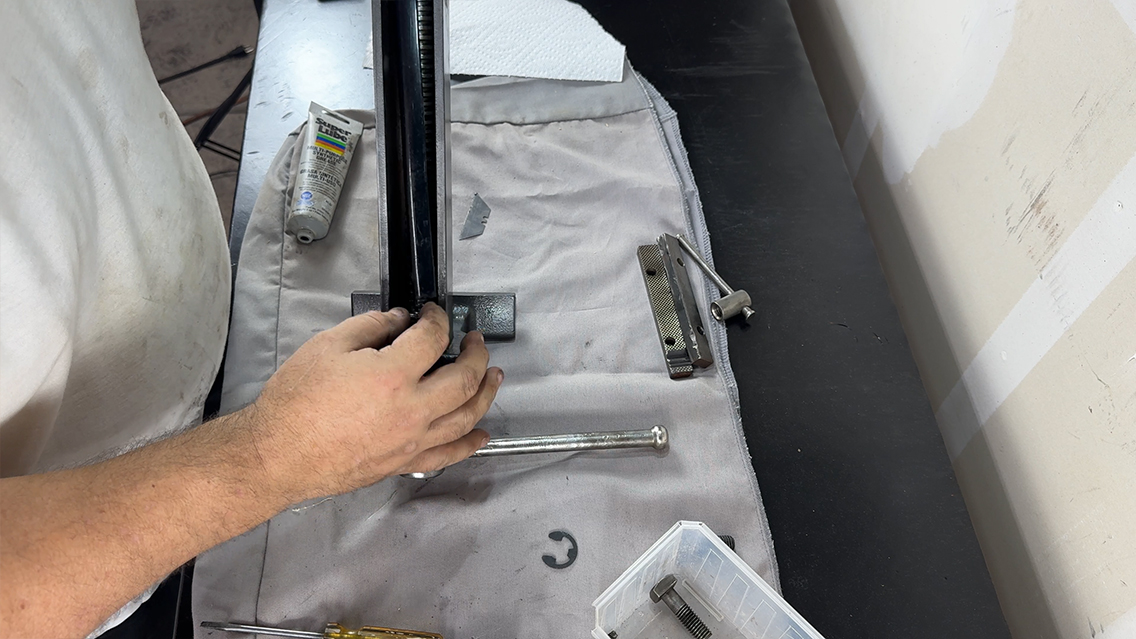
I used grease inside the movable jaw assembly where the spring, washer, and e-clip were to spin.
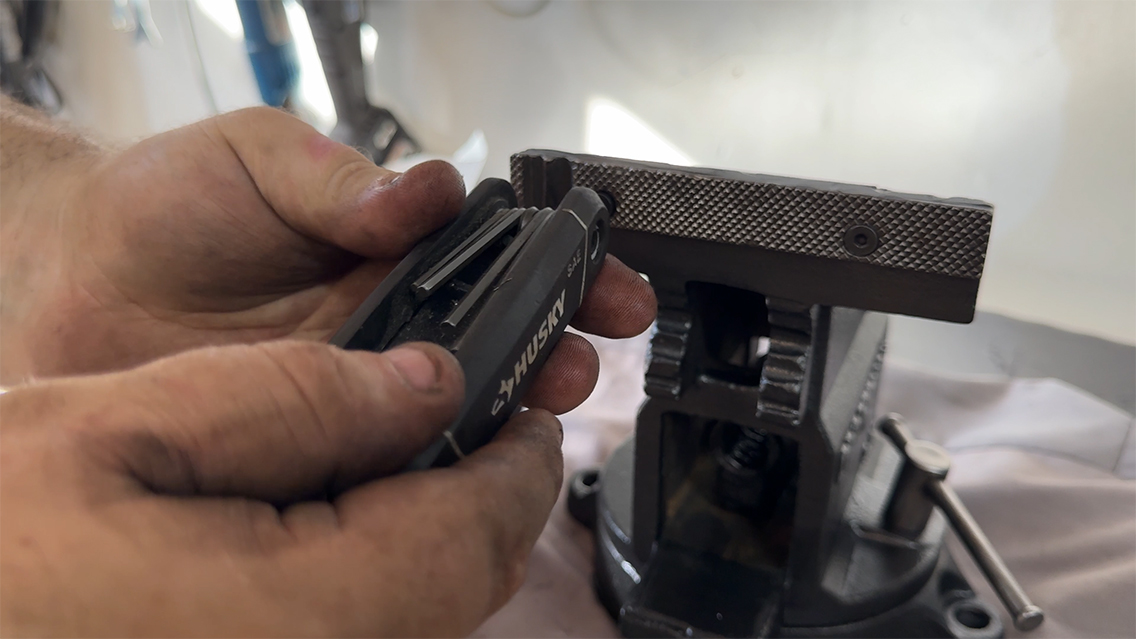
I installed the vise jaws. Incidentally, the screws to the jaws were seized from all the rust when trying to take them off. So I had to drill them out being careful not to damage the movable jaw/body threads.
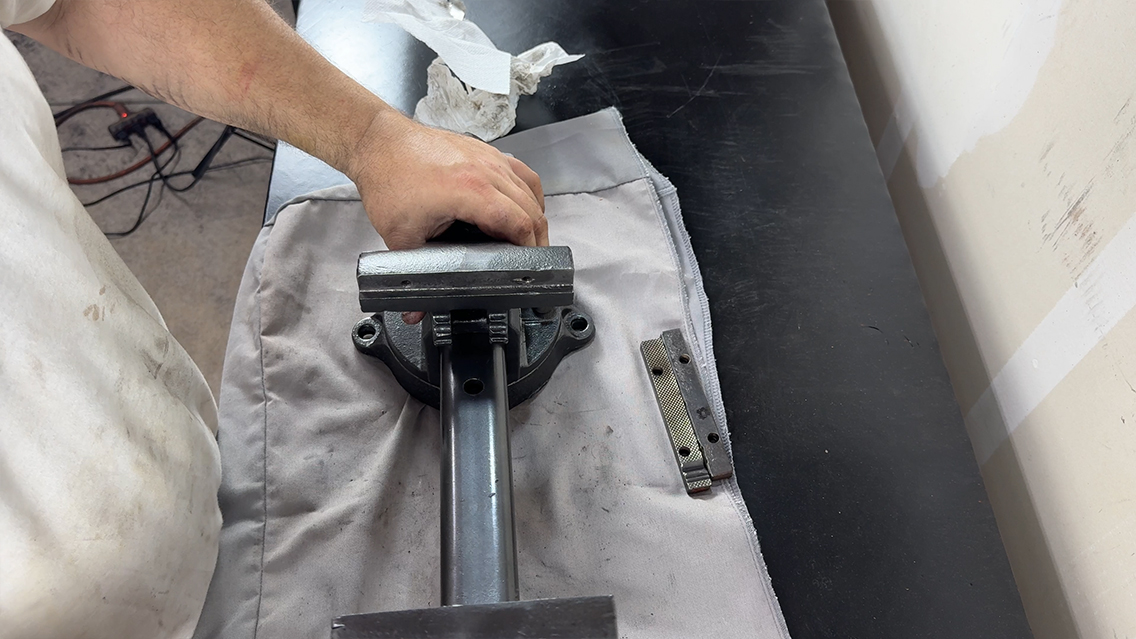
I then grabbed the base and greased the top followed by the bottom of the vise body for fluidity. I placed the swivel locking bolt through the bottom of the base and set the body of the vise down on the base. I secured them together with the swivel lock lever nut.
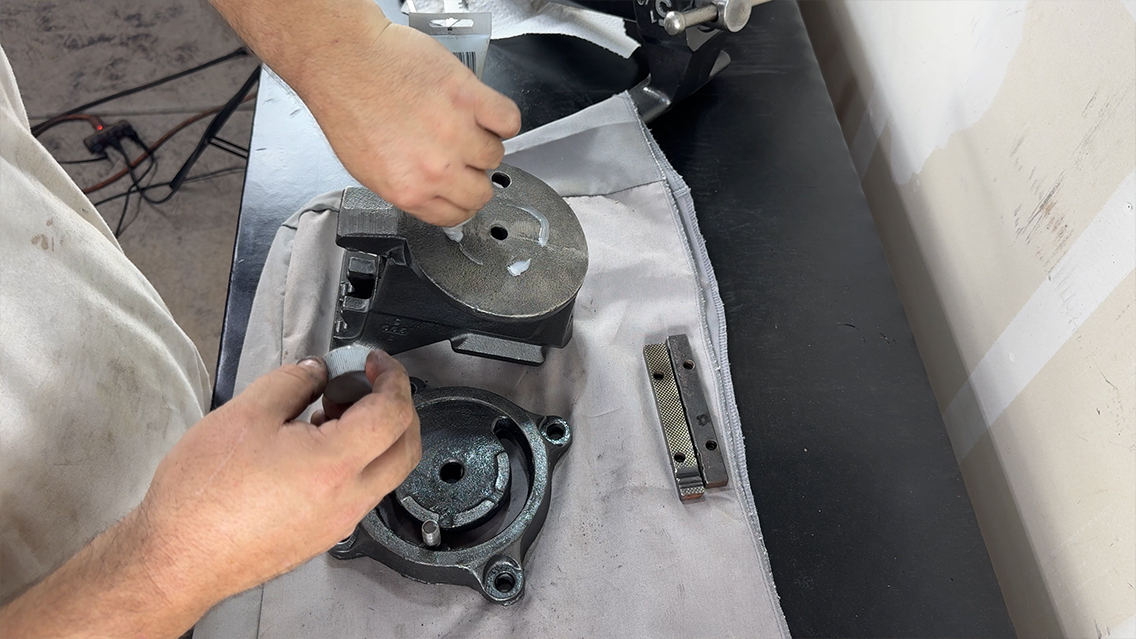
I then greased inside the replaceable nut, put it inside the vise, and bolted the body to the replaceable nut using the bottom bolt. Then I screwed the shaft through the replaceable nut until it started to feed through the body. It was assembled!
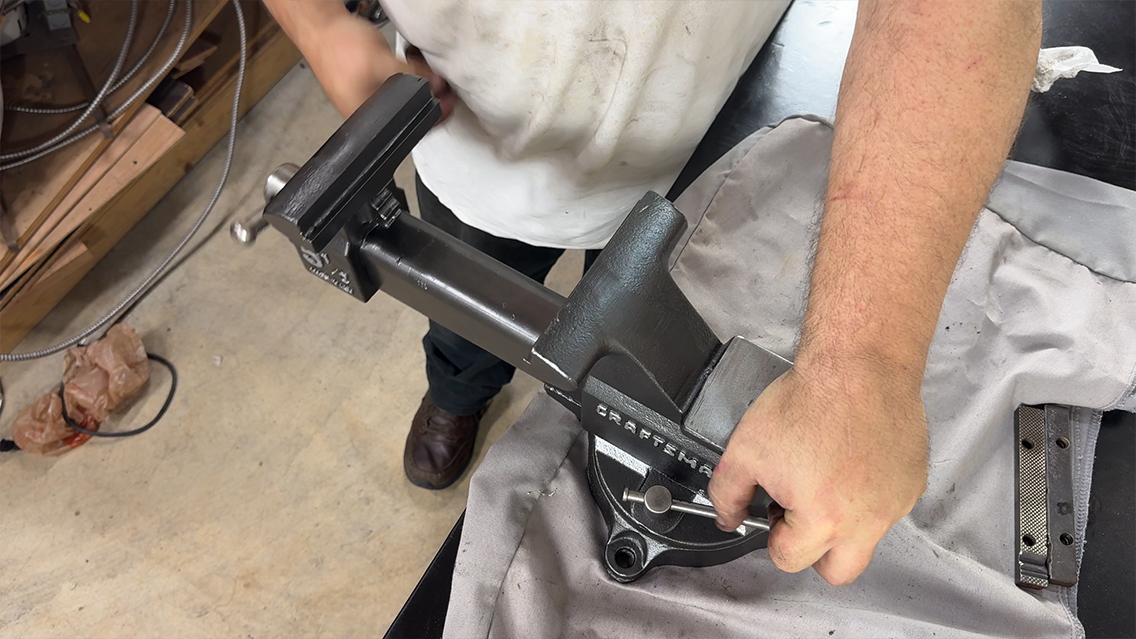
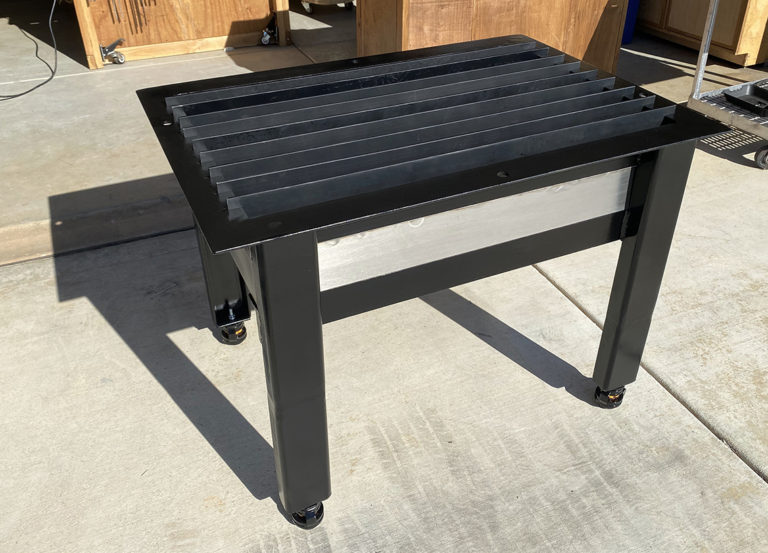
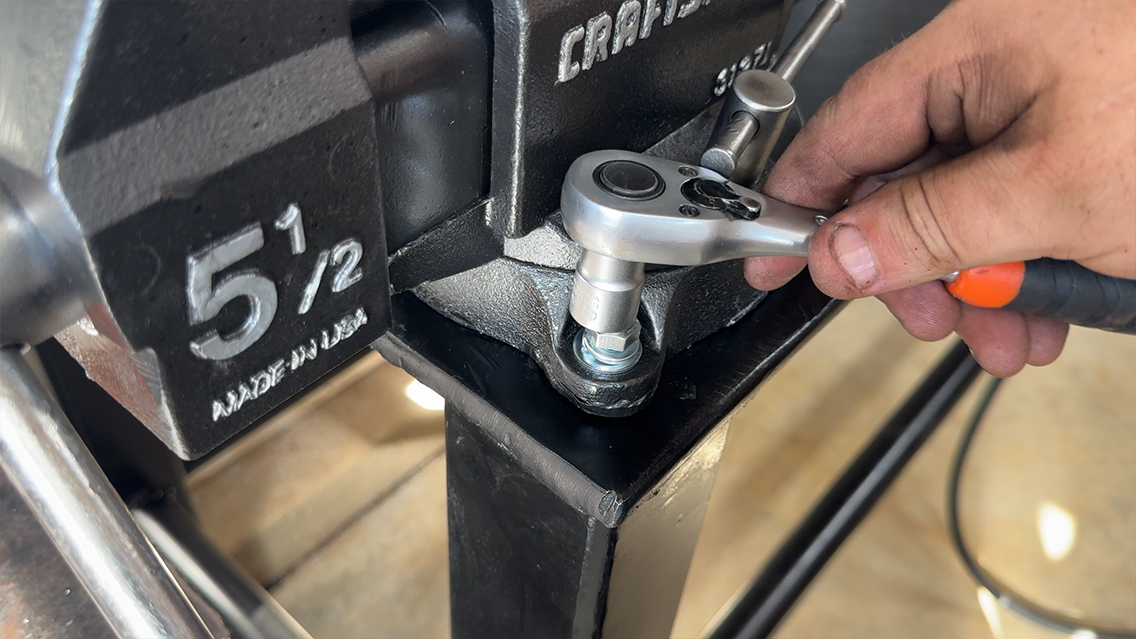
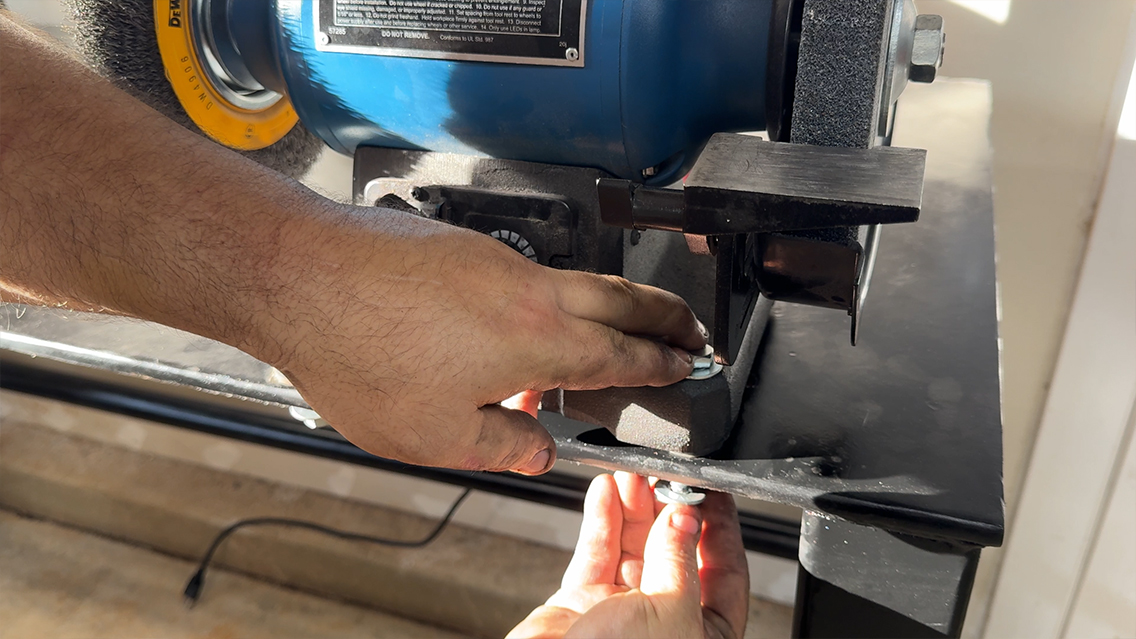
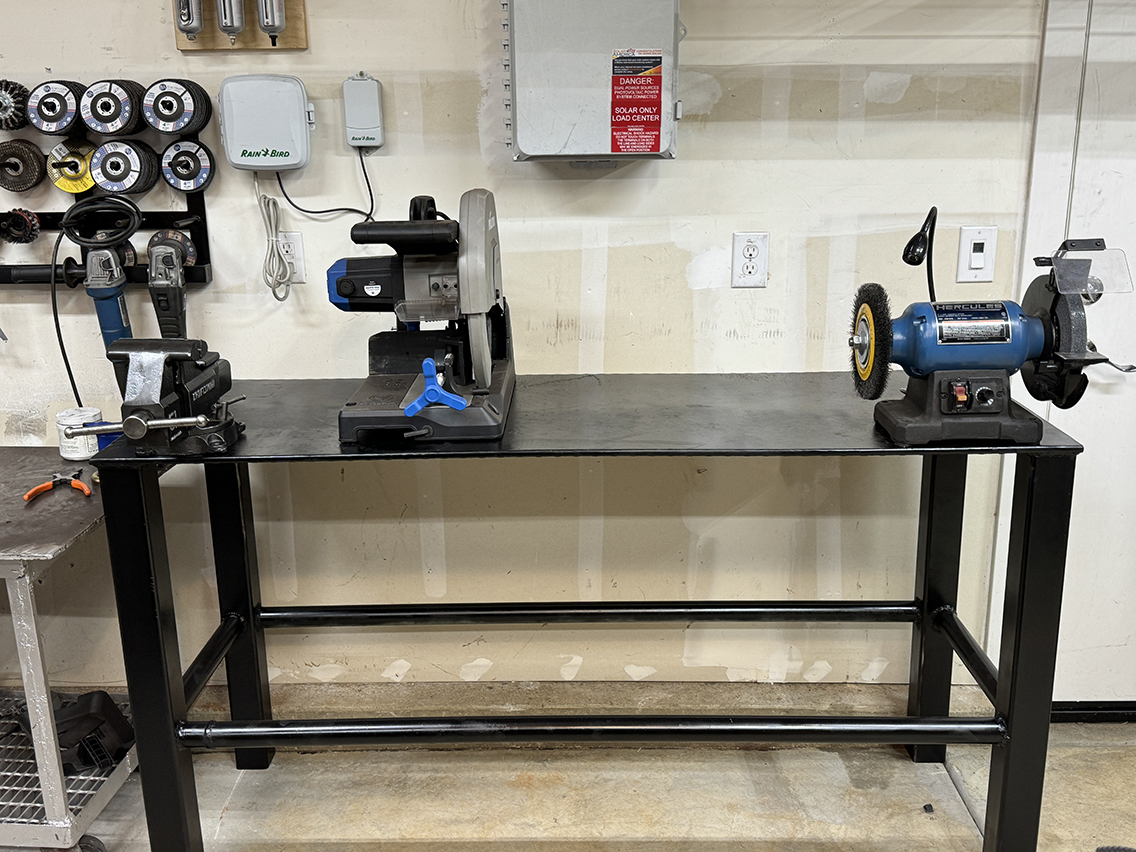
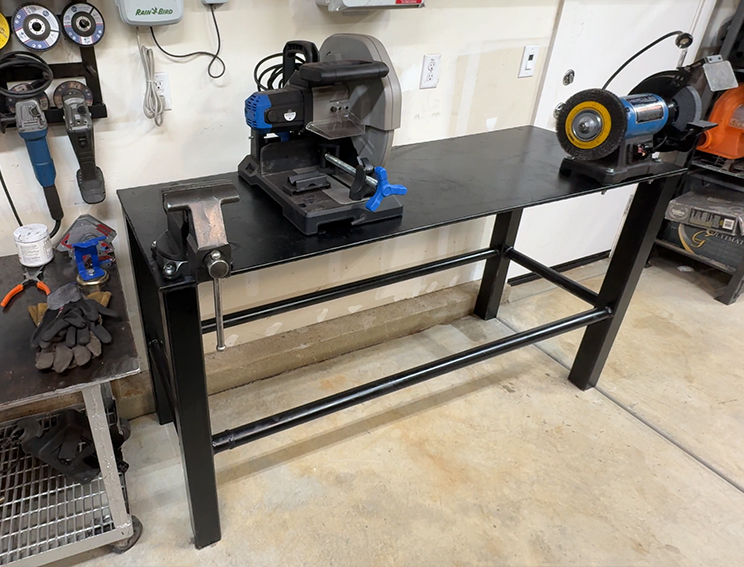
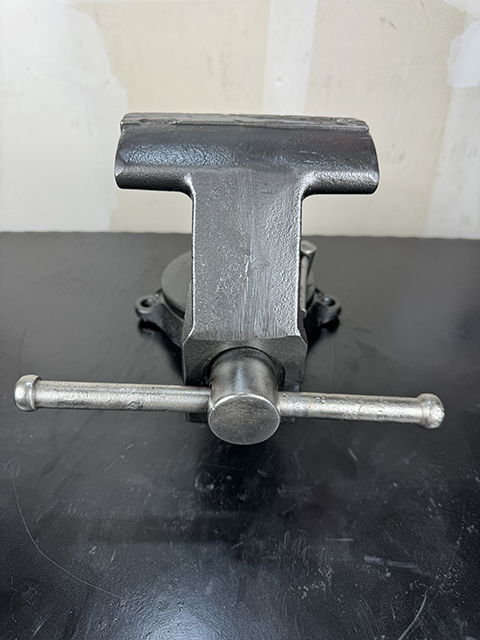
It glided smoothly and worked flawlessly. I wanted to put the vise on the corner so it could rotate and have clearance to be used on the side or front of the bench. So I tapped a 3/8″ -16 hole inside the top square tube leg and drilled the other three installation holes on the bench. I then drill out the holes for my Hercules bench grinder and installed it. I will just let the Evolution S380 CPS float around on the bench and secure it with a clamp for now. The Evolution slides back from the vise and grinder’s path, so it has plenty of room to cut long stock on either end.

They look awesome sitting on the bench. I couldn’t be more pleased with how the metalworking side of my workshop is coming along! I can’t wait to find another old tool to restore! Thanks for reading and supporting this site. Have a great day! Enjoy the final restoration photos!


YouTube Episode:
The Benchmark Abrasive products I use are:
- Cut, Grind, Finish! All-In-One Variety Pack
- 4-1/2″ x 7/8″ T27 Zirconia High Density Flap Disc – Mixed Grit 10
- 4-1/2″ x 7/8″ T29 Zirconia High Density Flap Disc – Mixed Grit 10
- 4-1/2″ x .040 x 7/8″ T1 High Performance 4X Ceramic Cutting Wheels
- 4-1/2″ x .040 x 7/8″ T27 High Performance 4X Ceramic Cutting Wheels
- 4″ Standard Twist Knot Wire Wheel – Carbon Steel
- 4″ Stringer Bead Wire Wheel – Carbon Steel
Tools Used: (Affiliate Links)
- Husky 200 PSI – 27 Gallon Oil Free Compressor
- Dremel Platinum Edition 4000
- SolidWork Safety Goggles (They work with eyeglasses)
- 3M Resperator
- Ridgid 18v Brushless Angle Grinder
- Markal 96006 – Markal Silver-Streak Holder w/Insert
- Spring Loaded Puncher Set
- Irwin 3/8-in Center Punch IRHT82538 (Not Shown)
- TILLMAN 1350XL Welding Gloves
- 3M Resperator Cartridges
- FastCap PSSR-16 16 Foot Pro Carpenter Standard Reverse Measuring Tapes
- The Ridgid Shopvac
- Bessey Drill Press Vise
- Atlas Model 73 Drill Press (1945)
- Harbor Freight HERCULES Variable Speed Bench Grinder
- Harbor Freight 8″ MultiPurpose Scissors
- Harbor Freight Doyle 4 1/2″ Bench Vise
- Harbor Freight 50ft Pneumatic Hose Reel
- Harbor Freight HERCULES 13 Amp 4-1/2 in. to 6 in. Trigger Grip Angle Grinder